Image Gallery or Photo Gallery is a popular feature of web applications to allow users to upload and manage images. The dynamic image galleries are created in web application to allow users to upload or delete images and display with features like scroll and lightbox to view images.
If you’re looking for solution to create dynamic image gallery, then you’re here at the right place. In our previous tutorial you have learned how to upload multiple images with jQuery and PHP and crop image and upload with jQuery and PHP. Here in this tutorial, you will learn how to create dynamic image gallery using PHP and MySQL.
The tutorial explained in easy steps with live demo to allow user login, upload and manage images in their gallery and display with lightbox.
Also, read:
So let’s create example to create dynamic image gallery using PHP and MYSQL. The file structure for the example is following.
Steps1: Create MySQL Database Tables
First we will create MySQL database table gallery_user using below query to store users information to login and create gallery.
CREATE TABLE `gallery_user` (
  `id` int(11) NOT NULL,
  `email` varchar(100) NOT NULL,
  `password` varchar(100) NOT NULL,
  `first_name` varchar(100) NOT NULL,
  `last_name` varchar(100) NOT NULL,
  `mobile` int(11) NOT NULL,
  `address` text NOT NULL
) ENGINE=InnoDB DEFAULT CHARSET=latin1;
We will also create MySQL database table gallery using below query to store gallery images information.
CREATE TABLE `gallery` (
  `id` int(11) NOT NULL,
  `user_id` int(11) NOT NULL,
  `image_title` varchar(255) NOT NULL,
  `image_description` varchar(255) NOT NULL,
  `image_name` varchar(255) NOT NULL
) ENGINE=InnoDB DEFAULT CHARSET=latin1;
Steps2: Create User Login
In index.php, we will create login form and handle login functionality to access user section to view gallery.
include_once("db_connect.php");
session_start();
$error = '';
if(isset($_POST["user_login"])) {
	$user_email=$_POST["user_email"];
	$user_password=$_POST["user_password"];
	$sql_query="SELECT id, email, password, first_name, last_name FROM gallery_user WHERE email='$user_email' AND password='$user_password'";
	$resultset = mysqli_query($conn, $sql_query) or die("database error:". mysqli_error($conn));
	$row=mysqli_fetch_array($resultset);
	if(mysqli_num_rows($resultset)>0) {
		$_SESSION["userid"]=$row["id"];
		$_SESSION["name"]=$row["first_name"]." ".$row["last_name"];
		header("location:user.php");
	} else {
		$error =  "Login failed! Please try again.";
	}
}
Steps3: Upload Images in Gallery
In upload_image.php, we will create image upload form and handle functionality to upload images to server and also insert image details into MySQL database table gallery.
include_once("db_connect.php");
session_start();
$error = '';
if(isset($_POST["upload_image"]) && $_SESSION["userid"]) {
	$title=$_POST["title"];
	$description=$_POST["description"];
	$fk_uid=$_SESSION["userid"];
	$image=$_FILES["image"]["name"];
	if ($_FILES["image"]["type"]=="image/gif"
	|| $_FILES["image"]["type"]=="image/jpeg"
	|| $_FILES["image"]["type"]=="image/pjpeg"
	|| $_FILES["image"]["type"]=="image/png"
	&& $_FILES["image"]["size"] < 20000) {
		if ($_FILES["image"]["error"]>0)	{
			echo "Error:".$_FILES["image"]["error"];
		} else {
			$i=1;
			$success = false;
			$new_image_name=$image;
			while(!$success) {
				if (file_exists("uploads/".$new_image_name)) {
					$i++;
					$new_image_name="$i".$image;
				} else {
					$success=true;
				}
			}
			move_uploaded_file($_FILES["uploaded_file"]["tmp_name"],"uploads/".$new_image_name);
			$insert_sql = "INSERT INTO gallery(id, user_id, image_title, image_description, image_name)
				VALUES('', '". $_SESSION["userid"]."', '".$title."', '".$description."', '".$image_name."')";
			mysqli_query($conn, $insert_sql) or die("database error: ". mysqli_error($conn));
		}
	} else {
		$error = "Please upload valid image file";
	}
}
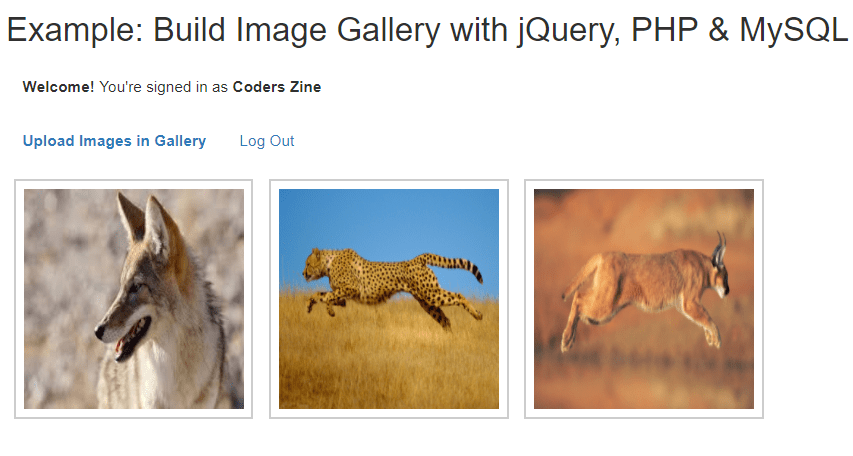
Steps4: View Gallery
In gallery.php, we will display logged in user’s gallery. The gallery images displayed with jQuery ligthbox feature to display image in light when clicked.
<?php if (isset($_SESSION['userid'])) { ?>
	<div class="row">
		<div class="navbar-collapse gallery">
			<ul>
			<?php
				$sql_query="SELECT id, user_id, image_title, image_description, image_name FROM gallery WHERE user_id='".$_SESSION["userid"]."'";
				$resultset = mysqli_query($conn, $sql_query) or die("database error:". mysqli_error($conn));
				while($rows = mysqli_fetch_array($resultset) ) { ?>
				<li>
					<a href="http://localhost/coderszine/build-image-gallery-with-jquery-php-mysql/uploads/<?php echo $rows["image_name"]; ?>" data-lightbox="<?php echo $_SESSION['userid']; ?>" data-title="<?php echo $rows["image_title"]; ?>"><img
			src="https://localhost/coderszine/build-image-gallery-with-jquery-php-mysql/uploads/<?php echo $rows["image_name"]; ?>" class="images" width="200" height="200"></a>
				</li>
				<?php } ?>
			</ul>
		</div>
	</div>
<?php } ?>
You may also like:
- Follow and Unfollow System with PHP & MySQL
- GST Billing System with PHP & MySQL
- Restaurant Management System with PHP & MySQL
- Visitor Management System with PHP & MySQL
- Student Attendance System with PHP & MySQL
- Like and Dislike System with Ajax, PHP & MySQL
- Build Star Rating System with jQuery, PHP & MySQL
- User Registration and Login System with PHP & MySQL
- Build Contact Form with PHP and Ajax
- To-do List Application with Ajax, PHP & MySQL
- Build Event Calendar with jQuery , PHP & MySQL
- Create Dynamic Bar Chart with JavaScript, PHP & MySQL
You can view the live demo from the Demo link and can download the source from the Download link below.
Demo Download
image lightbox feature, could you please elaborate on it or show the code it is important for me, thank you! Also, thank you much for doing this great tutorials!!!!
The lightbox plugin is used to display lightbox with gallery images. In gallery.php, the data-lightbox attribute used display lightbox. thanks!
I’ve download the Build Dynamic Image Gallery with PHP & MySQL code but I’m not able to login locally how can I resolve that
Try to debug it to know that exact issue. Otherwise you can send your code to me to fix for you. thanks!
This will not allow me to download even after i click the like button
it’s working and allow download. please reload the page after like. thanks!
Two questions:
1. I can’t get the ‘next’ and ‘prev’ arrows to show up, nor do the arrows on my keyboard work. My folders are arranged differently, so I changed the paths to the images in the .css file, and the ‘loading’ and ‘close’ images work, so do you know what the problem is?
2. Is there a way to make the border go away without removing the tags? If not, are the tags necessary for any reason?
UPDATE:
1. I went ahead and arranged my folders the same way as the demo; no change. Arrow icons still don’t appear and arrow keys still don’t work.
2. I’m specifically referring to the li tags here.
I am checking this. You can also fix this as per your requirement. thanks!
Its working in live demo. You can download project file and setup same. It should be work. This is handled with CSS, so you can make changes as per your tags. thanks!
Hi, downloaded, installed and is working, excellent bit of coding and info. How easy/difficult would it be add link to auto play the whole slideshow rather than click next? Assuming it’s possible you’d have some timer somewhere.
Thanks for the good work.
I am checking this and update you. You can also search for slideshow plugin to auto play slideshow. thanks!